OpenShift container platform provides support LDAPv3. You can integrate the OpenShift Cluster to use LDAP authentication. That will allow users to log in to OpenShift with their LDAP account. But it will be a single point of failure, meaning that if LDAP server becomes unavailable then all OpenShift platform requires authentication would also be unavailable.
“ Additionally, this basic configuration has no access control of its own; all LDAP users matching the configured filter are able to log into OpenShift Container Platform. “
Step 1: Get LDAP integration users’ information
You need an authentication user to search the LDAP server. I strongly recommend creating a specific LDAP user and group that the OpenShift platform uses.
Powershell commands get a username and group Distinguished name:
Get-ADUser <username> -Properties DistinguishedName | Select-Object DistinguishedName
Get-ADGroup <groupname> -Properties DistinguishedName | Select-Object DistinguishedName

Step 2: Backup master configuration
If you have already completed the installation of OpenShift, then check if “master-config.yaml ”exists under “/etc/origin/master” directory.
#cp /etc/origin/master/master-config.yaml /etc/origin/master/master-config.yaml_ldap_backup
Step 3: LDAP search
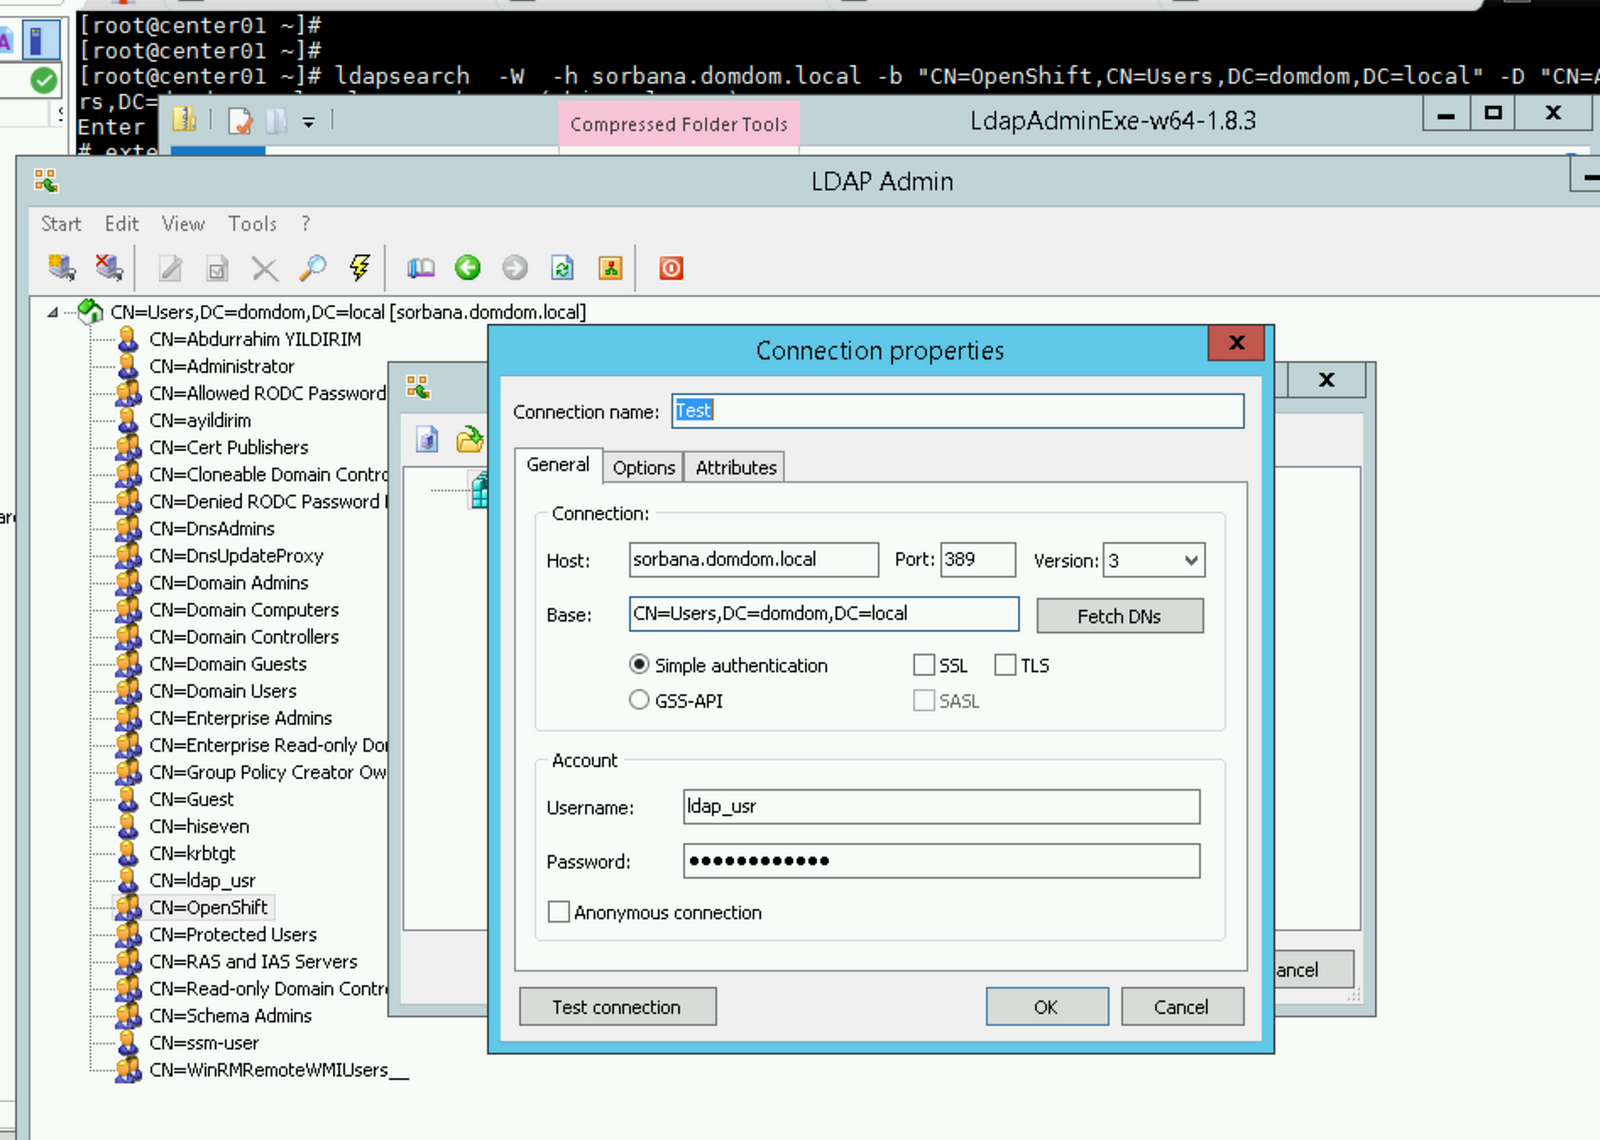
Before starting to create your config set you should install an LDAP client to test your LDAP server. I added two options that you can install for Linux and Windows.
Windows:
Download the LDAP admin tool from that link.
Linux :
Install OpenLDAP binaries to use ldapsearch.
#yum install -y openldap*
Username:ldap_usr
Group:OpenShift
Ldap Server: sorbana.domdom.local
# ldapsearch -W -h sorbana.domdom.local -b “CN=OpenShift,CN=Users,DC=domdom,DC=local” -D “CN=ldap_usr,CN=Users,DC=domdom,DC=local” -s sub -x “(objectclass=*)”

Step 4: Create an OpenShift LDAP configuration
You should perform steps 3–4 for the master nodes.
[root@master01 ~]# oc get nodes
NAME                    STATUS    ROLES     AGE       VERSION
infra01.domdom.local    Ready     infra     14d       v1.11.0+d4cacc0
infra02.domdom.local    Ready     infra     14d       v1.11.0+d4cacc0
infra03.domdom.local    Ready     infra     14d       v1.11.0+d4cacc0
master01.domdom.local   Ready     master    14d       v1.11.0+d4cacc0
master02.domdom.local   Ready     master    14d       v1.11.0+d4cacc0
master03.domdom.local   Ready     master    14d       v1.11.0+d4cacc0
worker01.domdom.local   Ready     compute   14d       v1.11.0+d4cacc0
worker02.domdom.local   Ready     compute   14d       v1.11.0+d4cacc0
worker03.domdom.local   Ready     compute   14d       v1.11.0+d4cacc0
After defining your LDAP information you need to add this config set to the “oauthConfig”.
#vi /etc/origin/master/master-config.yaml
- challenge: true
login: true
mappingMethod: claim
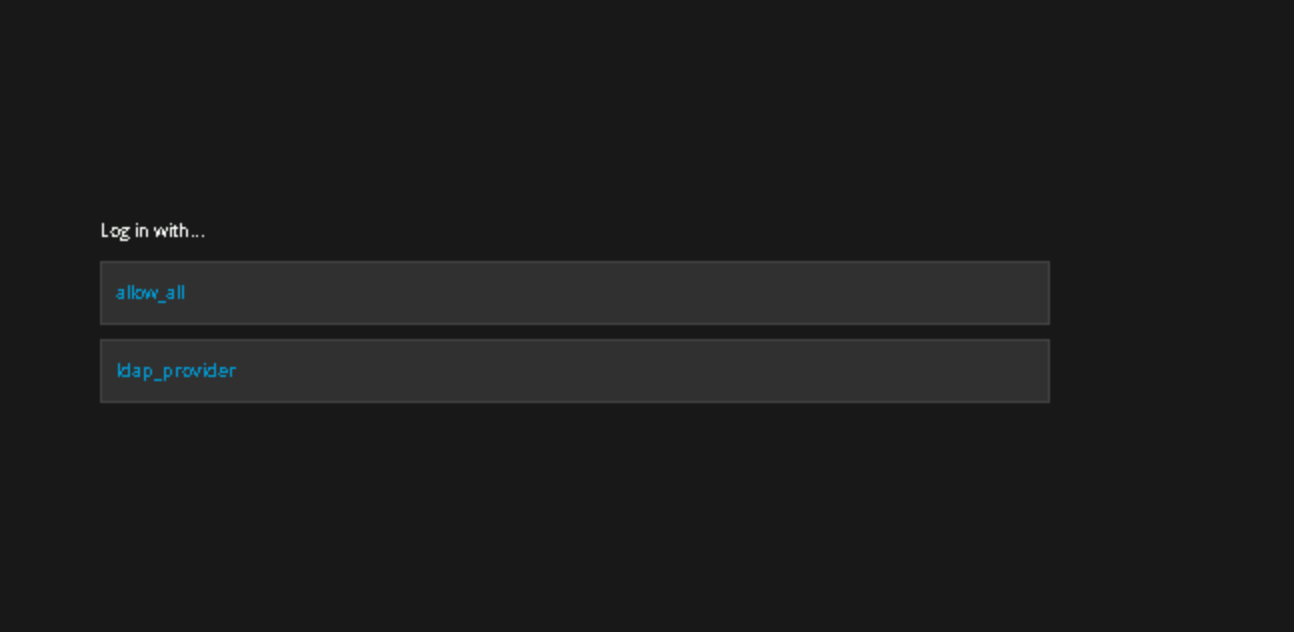
name: "ldap_provider"
provider:
apiVersion: v1
kind: LDAPPasswordIdentityProvider
attributes:
email:
- mail
id:
- sAMAccountName
preferredUsername:
- sAMAccountName
bindDN: "CN=ldap_usr,CN=Users,DC=domdom,DC=local"
bindPassword: "Welcome1!"
insecure: yes
url: "ldap://sorbana.domdom.local/DC=domdom,DC=local?sAMAccountName"
Step 5: Restart master-api service
[root@master01 ~]# oc get nodes
NAME                    STATUS    ROLES     AGE       VERSION
infra01.domdom.local    Ready     infra     14d       v1.11.0+d4cacc0
infra02.domdom.local    Ready     infra     14d       v1.11.0+d4cacc0
infra03.domdom.local    Ready     infra     14d       v1.11.0+d4cacc0
master01.domdom.local   Ready     master    14d       v1.11.0+d4cacc0
master02.domdom.local   Ready     master    14d       v1.11.0+d4cacc0
master03.domdom.local   Ready     master    14d       v1.11.0+d4cacc0
worker01.domdom.local   Ready     compute   14d       v1.11.0+d4cacc0
worker02.domdom.local   Ready     compute   14d       v1.11.0+d4cacc0
worker03.domdom.local   Ready     compute   14d       v1.11.0+d4cacc0
[root@master01 ~]# master-restart  api
2
[root@master01 ~]#master-logs  api api
[root@master02 ~]# master-restart  api
2
[root@master02 ~]#master-logs  api api
[root@master03 ~]# master-restart  api
2
[root@master03 ~]#master-logs  api api
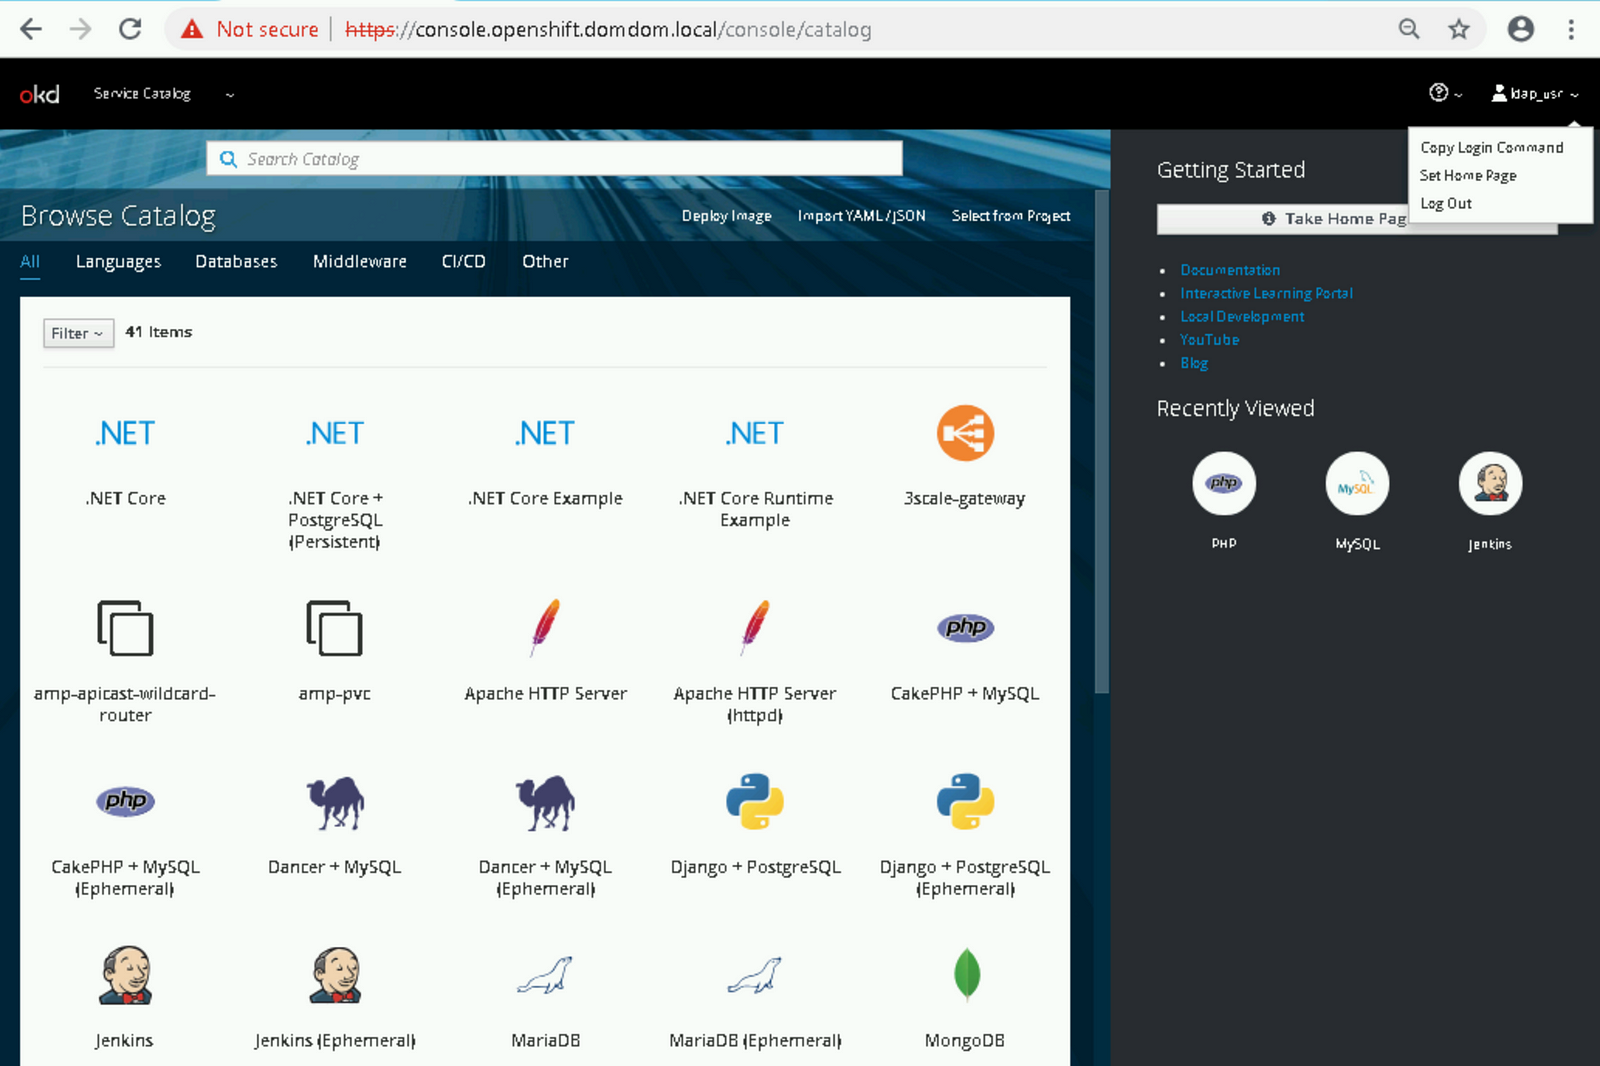
Step 5: Connect OpenShift Web Console